Deutsch
  Français
  Español
» TODAY YOU START YOUR STRATOSPHERE ADVENTURE «
If you have made sure that the entire probe, including Technology, is fully equipped and it is ready for use, the weather balloon must first be made ready. For this you go through the weather balloon checklist twice as a precaution! At the same time, the GPS tracker can be switched on to check whether everything really works perfectly. Now the weather balloon should be filled with the amount of helium previously calculated via the helium calculator.

Our helium calculator helps you to calculate the required amount of balloon gas for your weather balloon. We recommend an ascent speed of about 5m/s, the helium calculator will then output the required amount of gas. In combination with the flight route calculation, you can even influence the flight distance and thus the landing place a little bit.
The following videos show the installation of the cylinder pressure reducer and the filling process:
Attention: Since the cameras generate heat, they should be switched on shortly before take-off. This prevents overheating of the cameras inside the polystyrene probe.
After the weather balloon according to the instructions is sealed, the special cord is knotted to the weather balloon. It is better to make too many knots than too little. The special cord now leads to the parachute and is knotted to the top of the parachute. A second piece of special cord is then knotted from the lower end of the parachute to the probe. According to the instructions of the weather balloon kit, the cords coming out of the lid of the polystyrene probe are now knotted to the special cord of the parachute. It’s best for a member of your team to check if all the knots are really sitting!
Now you can connect the batterypack and cable to your camera. If the video settings of the cameras are correct and you are sure that you have inserted the SD cards, you can start recording and insert the camera into the camera hole of your probe.
The camera should be fixed with a strip of duct tape, so that the camera does not fall from the polystyrene wall inside the probe. During the entire installation and switching on the technology, the four-eye principle is recommended, so that really everything is thought of. Since just before closing the probe and setting up the equipment errors, which lead to failure of your project are the most likely to arise! Now the polystyrene probe can be closed with the lid. The lid should be completely wrapped with duct tape, so that all joints are sealed. Furthermore, the duct tape should be completely wrapped around the probe so that it cannot open in any case.
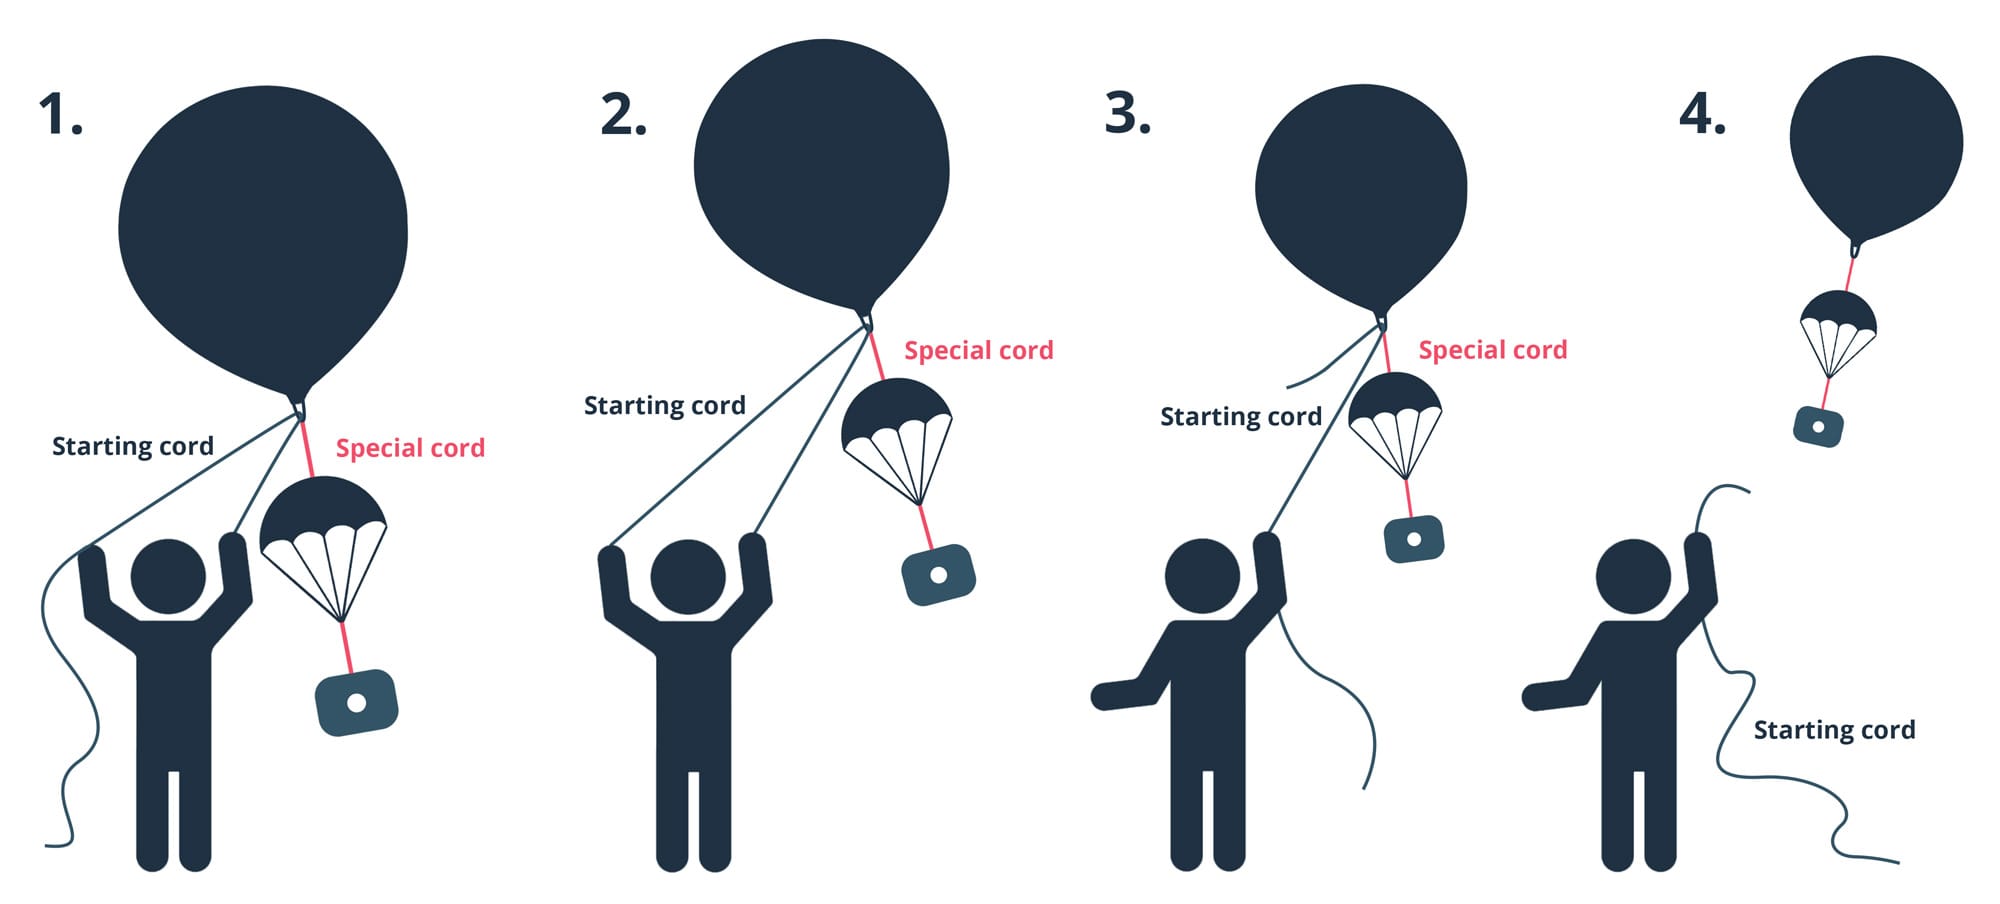
Now that the entire team and the equipment are ready for takeoff. It is best to start the weather balloon on an area where there are no higher buildings, trees, flagpoles etc. in the immediate vicinity. Two team members launch the weather balloon on a launch cord piece by piece, so that the entire unit rises on the special cord. A detailed description of the launch procedure with pictures for a safe ascent can be found in the eBook ‘How to launch a Weather Balloon’. In any case, a so-called “Jump Start” (simply releasing the weather balloon while the probe is still on the ground) must be prevented because the jerk is very extreme, and the special cord is subject to the tensile strength of 230N. If the weather balloon and parachute have been left open, the probe should be launched immediately. This will prevent a gust of wind from reaching the weather balloon, causing large forces on the line. The entire release should be done in one go.