Deutsch
  Français
  Español


Today, your stratospheric adventure begins
Once you have ensured that the entire payload, including all technical components, is fully assembled and ready for operation, the Weather Balloon must be prepared for launch. As a safety measure, it is strongly recommended that two people go through the checklist together several times. At the same time, the GPS tracker can be switched on to carry out a final check and make sure that everything is functioning correctly. The Weather Balloon can then be filled with the amount of helium previously calculated using the helium calculator.

Our helium calculator helps you determine the required amount of lifting gas for your Weather Balloon. We recommend an ascent rate of approximately 5 m/s (≈ 16 ft/s); the helium calculator will then calculate the necessary volume of gas for you. In combination with the flight path calculation, you can even influence the flight distance and, to a certain extent, the expected landing area.
The following videos show the installation of the pressure reducer as well as the balloon filling process.
Warning: Since the cameras generate their own heat, they should only be switched on shortly before liftoff. This helps prevent the cameras from overheating inside the polystyrene probe.
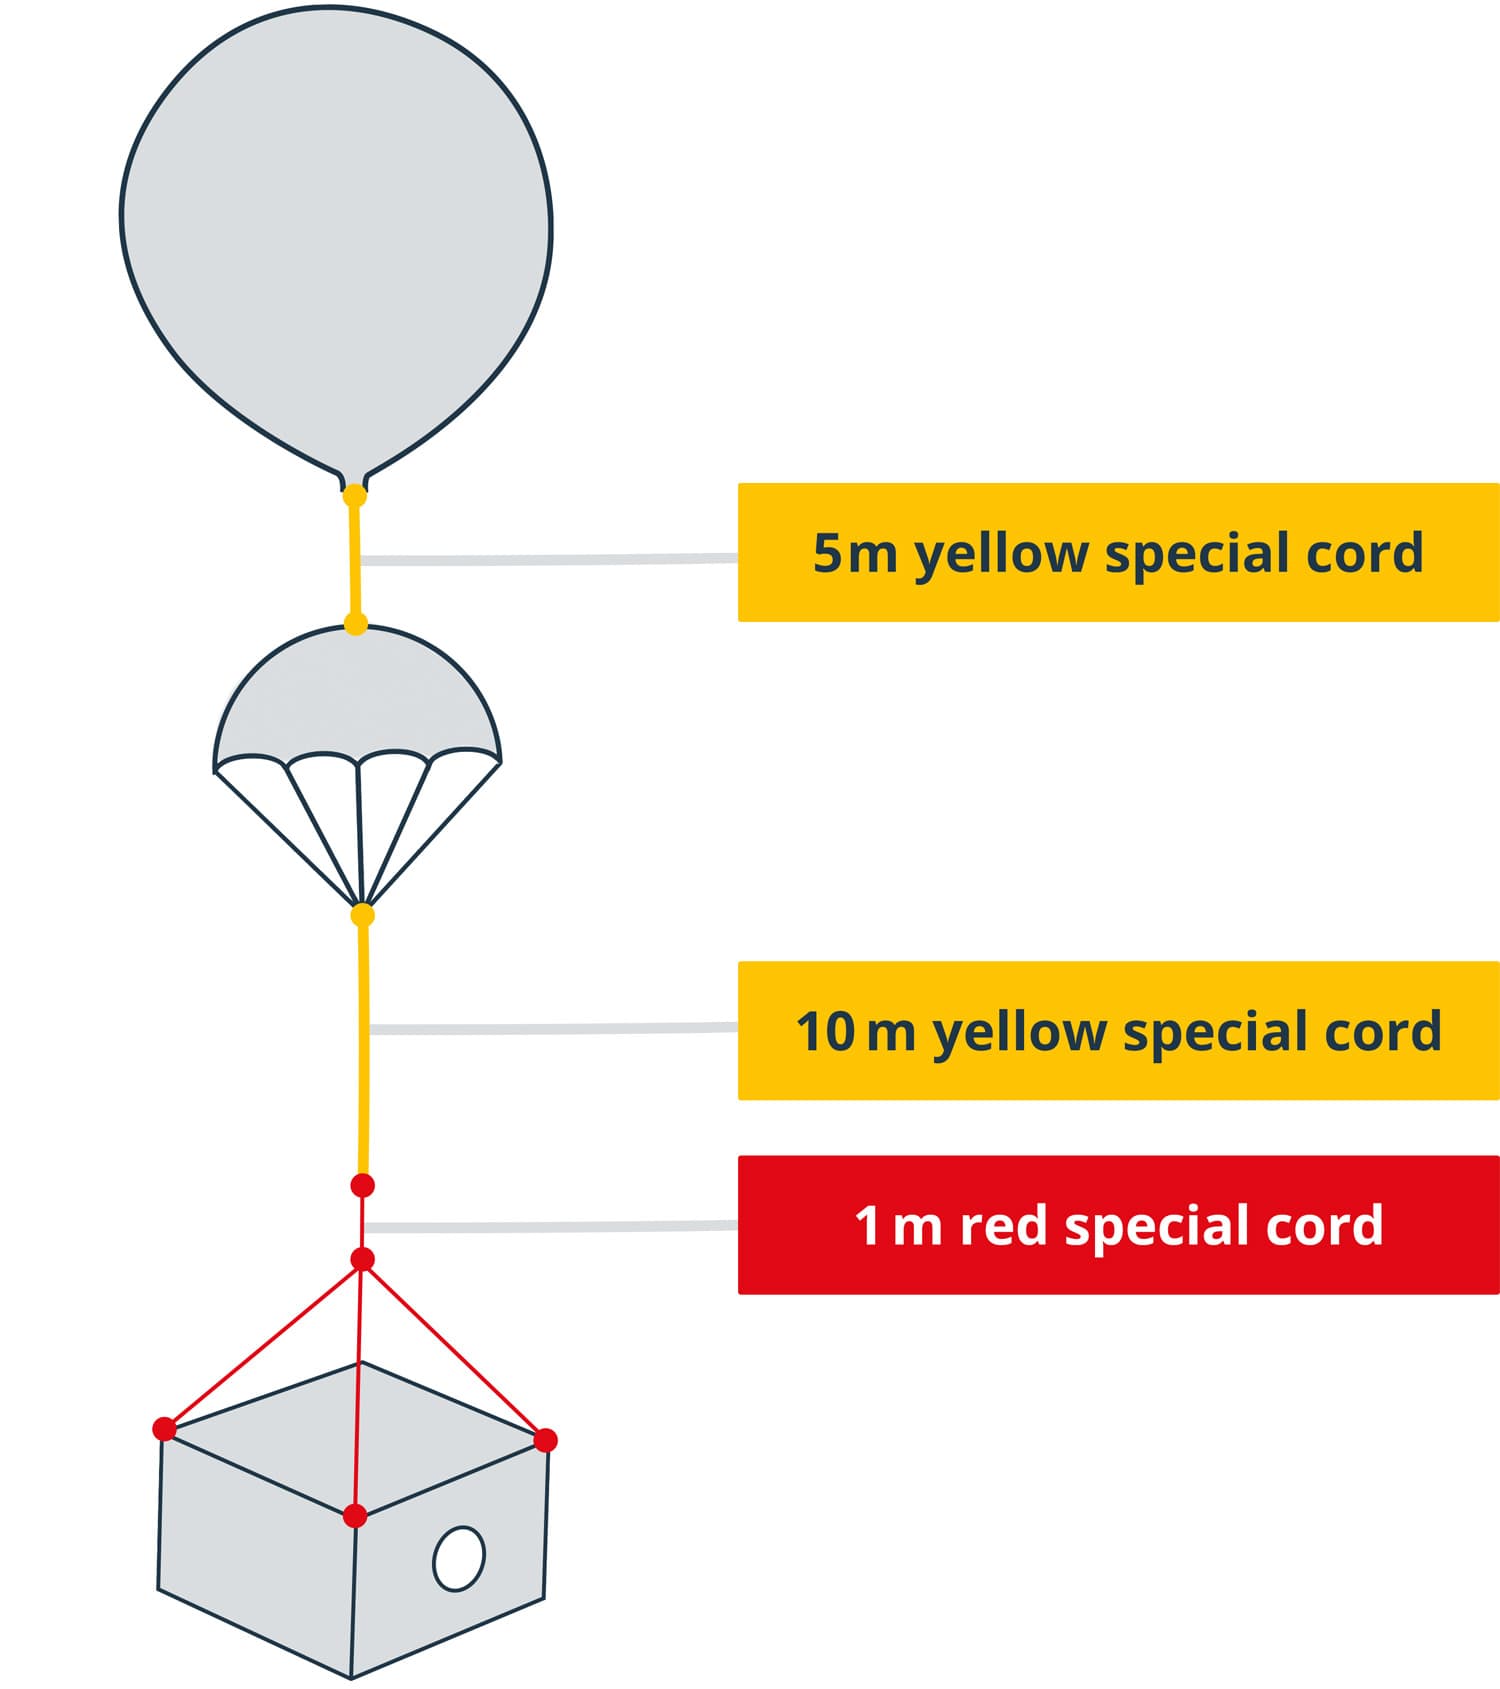
After the Weather Balloon has been sealed according to the supplied instructions, the Special Cord is used. We distinguish between yellow Special Cord and red Special Cord: The yellow Special Cord is tear-resistant and will later be used to launch the Weather Balloon. The red Special Cord is not tear-resistant; instead, it complies with the official requirements of the SERA regulation applicable within the EU. It therefore serves as the legally required predetermined breaking point and is a mandatory requirement for being allowed to launch the Weather Balloon in accordance with your flight permission. Now tie the yellow Special Cord to the valve of the Weather Balloon and connect the other end of the yellow cord to the top of the Parachute. As a general rule: it is better to use too many knots than too few. A second piece of yellow Special Cord is then attached to the lower end of the parachute and leads towards the Polystyrene Probe. Next, the red Special Cord is used: according to the instructions of the Weather Balloon Kit, the red cords exiting the lid of the polystyrene probe are tied together with an additional piece of red Special Cord approximately 1 metre in length. This 1-metre piece of red Special Cord can then be connected to the yellow Special Cord coming from the parachute. Finally, it is highly recommended to check once more that all knots are securely fastened.
The Batterypack, including its cable, can now be connected to your camera. Once the camera settings are correct and you have made sure that the SD cards are inserted, you can start the recording and place the camera into the camera opening of your probe.
The camera should be secured with a strip of Tesa duct tape to ensure that it cannot fall from the polystyrene wall into the interior of the probe. For the entire installation process and when switching on the equipment, the four-eyes principle is recommended, ensuring that nothing is overlooked. Especially when closing the probe and activating the equipment, mistakes often occur that can lead to the failure of the entire project. The Polystyrene Probe can now be closed with the lid. The lid should be completely wrapped with Tesa duct tape so that all seams are properly sealed. In addition, the tape should be wrapped all the way around the probe to ensure that it cannot open under any circumstances.
The entire setup consisting of the Weather Balloon, Special Cords, Parachute, and Polystyrene Probe including all technical equipment is now ready for operation. Ideally, the Weather Balloon should be launched from an open area with no tall buildings, trees, flagpoles, or similar obstacles in the immediate vicinity. If taller structures are nearby: no problem — the supplied Weather Balloon Guide also contains useful tips and tricks for such situations. As a reminder: the yellow Special Cord is nearly tear-resistant and is used to release the Weather Balloon. The red Special Cord, on the other hand, serves as the predetermined breaking point. The setup must never be held by the red Special Cord. Position yourselves so that the yellow Special Cord, the Parachute, and the Polystyrene Probe are aligned in the direction of the wind. Two team members now slowly and steadily release the Weather Balloon using the yellow Special Cord. Once the end of the yellow cord is reached, the Polystyrene Probe is suspended solely from the red Special Cord. Now it’s time: 10, 9, 8, … 3, 2, 1 — and off it goes on an adventurous journey to the edge of space. Have a great flight!